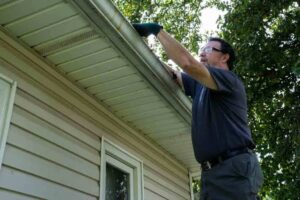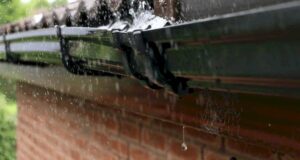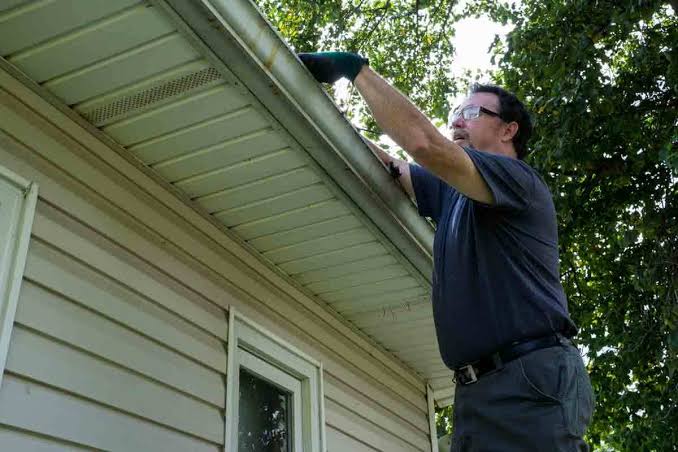
Understanding how to repair a leaking gutter starts with four steps: locate where water escapes, identify the cause, choose a repair that suits the damaged part, and check the result. A leaking joint may need a replacement seal or fitting. A cracked section may need replacing. Water spilling over the edge may come from a blockage rather than a hole.
Sealant is not the answer to every gutter fault. Covering a drip without checking the surrounding gutter can leave poor alignment, trapped debris or a damaged connector unresolved.
This guide follows one isolated leak from the first observation to the final rain check. It explains what homeowners can record from ground level, what a repair inspection should establish, and when professional access is needed.
For local help, Merseyside Gutters provides gutter repair services for leaking joints, damaged sections, sagging gutters and blocked downpipes.
What to Note When You First See the Leak
When you notice a drip, record its position before deciding what needs repairing. “The gutter leaks at the back” gives a repair company less information than “water drips beneath the connector above the kitchen window.”
Use a fixed feature to describe the location. This could be a doorway, window, corner or downpipe. Note whether water falls straight down, runs along the underside of the gutter or spreads across the wall.
Look at the pattern too. A slow drip beneath a joint is different from water pouring over the front edge. Several drops along one section may have a shared cause, such as water collecting in a low area.
Do not assume the place where the drop falls is exactly where water enters. Water can travel along a surface before falling from a lower point.
A useful first record includes the date, weather, location and anything visible nearby. Mention staining, loose guttering or a previous repair. These observations help explain how to repair a leaking gutter without making an early guess about the fault.
Checking the Area From Ground Level
Begin your gutter leak inspection from a safe position on the ground. You can gather useful information without climbing, touching fittings or standing beneath loose guttering.
Look along the affected run. Does it appear straight, or does one section dip? Is there a visible gap near a connector? Does water spill over the edge before reaching the downpipe?
Check the wall below. A dark line, green growth or repeated splash marks may help show where water has been escaping. However, a damp wall alone does not prove that the gutter is responsible. Roof defects and other building problems can produce similar signs.
Take one wide photograph showing the roof edge and surrounding windows. Then use your camera zoom for a closer view of the suspected fitting. A short video during rain may show the flow more clearly than a still photograph.
Keep away from slippery steps, standing water and areas where loose parts could fall. If the gutter appears to be pulling away, arrange an inspection rather than trying to move it yourself.
Recording When the Leak Happens
The timing of a leak can narrow down the likely cause.
A joint that drips during light rain may have a sealing or positioning fault. Water that escapes only during heavy rainfall may involve a restriction, poor alignment or a gutter that cannot handle the incoming flow.
These are clues, not confirmed diagnoses. A blocked outlet can also make an existing joint fault more noticeable by raising the water level.
Record whether the leak starts immediately or after rain has continued for a while. Note whether it carries on after rainfall stops. Continued dripping may suggest that water remains in the affected area.
For dripping gutter repair, a short description is often enough:
“Water starts dripping beneath the rear gutter connector after about ten minutes of rain. It continues briefly after the rain stops.”
If you have previously noticed the same fault, mention that too. Understanding how to repair a leaking gutter includes finding out why an earlier repair may have failed.
Identifying the Gutter and Damaged Part
The gutter material, shape and fittings affect the repair method. A part that looks similar may not connect or seal correctly.
Common gutter profiles include half round, square and ogee. Systems may be made from plastic, aluminium, steel, cast iron or other materials. Wikipedia provides a general explanation of rain gutters and their purpose.
At the leak location, the damaged component might be a union joining two lengths, a corner fitting, a stop end or the outlet connecting to a downpipe. Alternatively, the gutter channel itself may be cracked.
Where possible, identify the manufacturer and system before ordering replacement parts. Colour alone does not confirm compatibility.
A sound plastic gutter with one failed union may only need a local fitting replacement. A cracked length surrounded by brittle material needs a different assessment.
The practical answer to how to repair a leaking gutter therefore depends on what has failed. Buying sealant before identifying the part can waste time and leave the original problem in place.
Deciding Whether Safe Access Is Available
A leak can look simple from below while being difficult to reach safely.
Consider the height, ground conditions and obstacles beneath the gutter. A conservatory, sloping path, narrow passage or fragile roof can change the access requirements.
Do not climb onto an extension roof or lean out of an upstairs window to reach a fitting. Avoid stretching sideways from a ladder. A repair that needs both hands, force or repeated movement may require a more suitable working platform.
Ladders are not automatically the right choice for every job. HSE guidance explains that they can be suitable for some tasks with low risk and short duration, provided the equipment and method are appropriate.
If you cannot reach the area safely, keep your involvement to photographs and observations from the ground.
Knowing how to repair a leaking gutter does not mean carrying out the work yourself. It helps you explain the problem, understand the proposed repair and recognise whether the result has been properly checked.
Checking for Blockages Before Repairs
Before dismantling the suspected fitting, check whether debris is affecting water flow.
Leaves, roof moss and grit can collect beside an outlet or inside a gutter run. Water may rise behind this material and escape through a weak joint or over the edge.
A blockage can therefore make one location appear to be the only problem, even when the restriction sits further along the gutter.
Clearing should include the relevant channel and outlet. Removing a handful of leaves beside the drip may not restore drainage if the downpipe remains blocked.
Debris should be collected rather than pushed into the pipe. Once the area is clear, the repairer can inspect the fitting and surrounding material more accurately.
For single gutter leak repair, this step helps separate two questions: does water flow properly, and does the suspected joint remain watertight?
If the leak stops after clearing, inspect the area before deciding that no further work is needed. A damaged seal or cracked fitting may still require attention.
Selecting the Correct Repair
The repair should address the fault found during inspection.
A Leaking Joint With a Damaged Seal
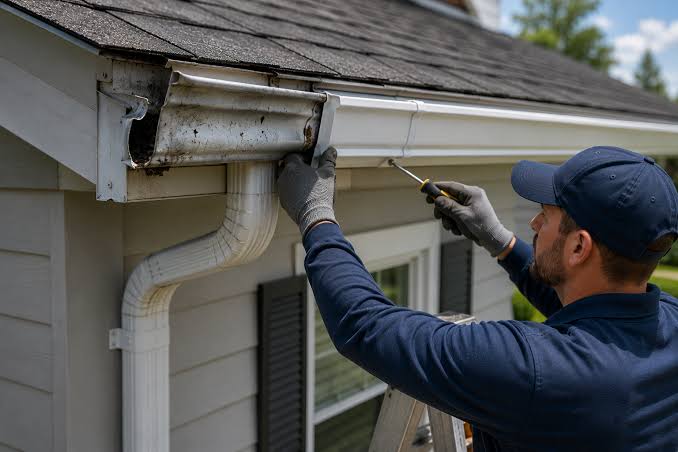
If the gutter and connector are sound but the seal is worn, a compatible replacement seal may be appropriate. The sealing surfaces also need checking for dirt, damage and incorrect positioning.
Where separate replacement seals are unavailable, replacing the complete fitting may be necessary.
A Cracked Connector or Broken Clip
A fitting with a cracked body or failed retaining clip may no longer hold the gutter securely. Covering the outside with sealant does not restore that grip.
A matching replacement fitting is usually the more suitable option.
A Gutter Length That Has Moved
A section that has shifted can leave the joint improperly seated. The repairer should check the position, support and insertion requirements.
Refitting may solve the leak, but the reason for movement also matters. A nearby bracket or damaged support could need attention.
A Crack or Hole in the Channel
A repair product must be suitable for the gutter material and defect. Some local damage may suit an approved patching method, while larger splits, distortion or weak surrounding material may require a replacement section.
For more detail, read our guide to repairing cracks and holes in rain gutters.
Choosing how to repair a leaking gutter should follow inspection. The size of the visible drip alone does not tell you which repair will last.
Preparing the Area
Preparation begins once the cause, access method and replacement parts are clear.
Remove debris around the affected area so the full defect is visible. Clean the relevant surfaces using a method suitable for the gutter material and proposed repair.
Avoid scraping plastic with sharp tools or using a cleaner that could damage the surface. Residue from an earlier repair may need careful removal before a fitting can sit correctly.
If a repair compound is being used, follow its instructions for cleaning, drying and any required primer. Products differ, so do not assume they all need the same preparation.
Inspect neighbouring parts while the fault is accessible. Look for damaged clips, loose brackets, further cracks or weak fascia where fixings attach.
Check the weather before starting. A product may require particular application conditions and time without rain.
Good preparation matters when learning how to repair a leaking gutter because even a suitable product can fail when applied to a dirty, unstable or incorrectly prepared surface.
Completing the Repair to Product Instructions
Carry out the repair according to the instructions for the actual gutter system and any repair product being used.
For a replacement joint, this includes correct fitting, support and gutter insertion. Plastic guttering needs allowance for normal expansion and contraction. For example, FloPlast instructions specify an expansion allowance and a suitable silicone spray lubricant on seals. Follow the requirements for your own system rather than applying one brand’s method to every gutter.
Do not confuse seal lubricant with adhesive sealant. They serve different purposes.
Where sealant or a patching product is appropriate, follow the stated application method and curing time. More material does not automatically create a better repair.
Avoid forcing clips or disturbing neighbouring fittings unnecessarily. If the gutter will not seat correctly, reassess the part, position and support.
Before leaving the repair area, check that fittings are secure and the gutter remains properly supported. Understanding how to repair a leaking gutter includes restoring normal movement and drainage, as well as stopping the visible drip.
Testing the Gutter
A repair needs a water test where this can be carried out safely.
If a product has been applied, wait for the required curing period before introducing water. Testing too soon may affect the repair.
Use a controlled flow upstream of the repaired location. Water should pass through the joint and travel towards the outlet. Directing water onto the outside of a fitting does not test whether it contains water flowing inside.
Watch the repaired point and nearby connections. Check whether the underside stays dry, whether water reaches the outlet and whether the downpipe discharges.
After stopping the flow, allow time for residual water to drain. Check again for a slow drip that was not obvious while water was moving.
A controlled test provides useful evidence, but it does not reproduce every rainfall condition across the roof.
The immediate aim is to confirm that the repaired component holds water during the test and that the relevant run drains properly.
Checking Again During Rain
The next rainfall provides a further check under normal conditions.
Observe from the ground and compare the repaired area with your earlier photograph or video. Is the original drip absent? Is water still spilling over the edge? Has a new wet line appeared nearby?
Check during rainfall that is reasonably similar to the conditions when the problem first occurred. A fault previously seen only in heavy rain may not be fully assessed during a brief light shower.
If the wall was wet before repair, it may take time to dry. An old mark does not prove that the gutter is still leaking. Look for fresh water escaping from the roof edge.
Learning how to repair a leaking gutter includes this follow up. A fitting that looks dry immediately after work still needs checking while the gutter is carrying rainwater.
If the problem returns, record where water appears and contact the repair company with the new information.
A Merseyside Gutter Repair Example
Hypothetical Worked Example, Not a Recorded Company Job
The following example illustrates one possible repair process at a Merseyside home. It is not a documented Merseyside Gutters job, customer account or claim about completed work.
The First Observation
A homeowner notices one drip above a rear kitchen window during steady rain. Water appears to fall beneath the connector joining two plastic gutter lengths.
They take a wide photograph and a short video from the garden. The rest of the visible gutter is not overflowing, but the wall directly beneath the drip becomes wet.
The Inspection
A repairer assesses the access requirements before reaching the gutter. Leaves are removed from the nearby channel so the fitting can be examined.
In this hypothetical example, the connector body is cracked. The adjoining gutter lengths remain sound, and the nearby supports are secure.
The outlet is also checked so that a separate drainage problem is not overlooked.
The Repair Decision
Because the connector itself is damaged, the chosen repair is a compatible replacement union. Applying sealant over the crack would leave the broken fitting in place.
The repairer confirms the gutter system, prepares the connection surfaces and installs the replacement according to its instructions.
The Final Checks
A controlled water test shows water passing through the repaired joint towards the outlet without dripping underneath. Nearby connections are checked too.
During the next comparable rainfall, the homeowner observes that the original drip is absent.
This example shows how to repair a leaking gutter by connecting each decision to an observed fault. It does not suggest that every isolated drip needs a replacement union. Another gutter could require clearing, a new seal or corrected support.
What If Another Drip Appears Nearby?
A new drip deserves inspection rather than an immediate second patch.
It may be a separate fault that was previously less noticeable. It could also mean that water is still collecting because of a blockage or poor alignment.
Record the new location and when it appears. Check whether it starts before or after the repaired area would normally have leaked.
Ask the repairer to review the neighbouring connections, support and drainage route. If several parts are weak, a wider repair may be more practical than dealing with each drip separately.
However, one newly noticed drop does not automatically mean the entire gutter needs replacing.
For homeowners comparing how to repair a leaking gutter with replacement, the main issue is the condition of the surrounding system. Our guide to common gutter leak causes and repairs explains why different faults need different approaches.
Gutter Repair Help Across Merseyside
When safe access or an uncertain fault makes the repair difficult, a professional inspection can establish what needs attention.
Merseyside Gutters offers local gutter repairs, including work on leaks, damaged sections, sagging guttering and blocked downpipes. Send photographs alongside a description of when and where water escapes.
For an isolated leak, ask what caused the problem, which part needs attention and how the repair will be checked. A clear explanation should connect the proposed work to the fault found.
You can arrange an assessment through our gutter repair service page.
Frequently Asked Questions
What Information Should I Give a Gutter Repair Company?
Provide the property address, approximate gutter height, leak location and the conditions when it happens. Mention access obstacles, previous repairs and any water entering the building. Include a wide photograph and, where possible, a short video showing the leak from ground level.
Can a Photograph Help Identify the Problem?
Yes. Photographs can show the gutter profile, visible damage, staining and access conditions. A video may show whether water drips from a joint or spills over an edge. However, images may not reveal a worn internal seal, hidden blockage or small crack. They support an assessment but may not confirm the exact fault.
How Do I Know Whether the Leak Has Stopped?
Check that the repaired point remains dry during a controlled water test and again during comparable rainfall. Water should reach the outlet without fresh dripping or overflow. Allow existing wall marks time to dry, and watch for new water rather than judging the result by an old stain.
What Should I Do If Another Drip Appears Nearby?
Record its position and timing, then contact the repairer. Ask for nearby fittings and water flow to be checked. Avoid applying sealant to each new drip before finding the cause. Several wet points may result from one drainage problem, or they may involve separate damaged components.
Is Sealant Enough to Repair a Leaking Gutter?
Sometimes a suitable repair product can address a local defect in sound material. It cannot restore a broken clip, correct sagging or clear a blocked outlet. For how to repair a leaking gutter at a joint, the seal, fitting and gutter position should be checked before choosing a product.
Can One Gutter Joint Be Replaced?
Often, yes, if the surrounding gutter is sound and compatible replacement parts are available. The repair should also check support and positioning so the new fitting is not exposed to the same problem. Brittle neighbouring material or repeated faults may change the recommended scope.
How Long Does a Gutter Repair Take?
The time depends on access, the damaged part, clearing requirements and whether a repair product needs to cure. A fitting replacement and a patch requiring dry conditions are different jobs. Ask for an estimate after inspection, including when water testing can take place.
Should I Repair the Gutter While It Is Raining?
Rain is useful for observing a leak from the ground, but it can make access and repair conditions unsuitable. Wet surfaces may also conflict with product instructions. Record the fault safely, then arrange the repair when the access method, weather and materials allow the work to be completed properly.
Does One Leak Mean I Need New Gutters?
No. A sound gutter system may only need one local repair. Replacement becomes more relevant when damage is widespread, suitable parts are unavailable or repeated repairs have failed. The decision should follow inspection of the affected area and surrounding guttering.
What Is the Best First Step for a Leaking Gutter?
Locate the escaping water from a safe ground position and record when it happens. Then arrange inspection of the suspected component and drainage route. The best approach to how to repair a leaking gutter is to confirm the cause before choosing the repair, then check the result with water and rain.